Bathroom Renovation - Part One: Design and Demo
/When we purchased our home, the first thing that had to go was the Jack and Jill bathroom. First, if you don't know what that is - it's a bathroom that's only accessible through rooms. Our sons room had a entry into the bathroom as well as our daughters. Our kids are small. So this was just a bad idea. I wasn't about to go through a kids room to use the bathroom - and it was the only "guest" bathroom in our home. So from the start we knew it was going to be removed - somehow. We decided (after many debates and heated discussions) that we would build a hallway (using part of a room) and close off the other side of the bathroom. The hallway was built and the bathroom was gutted. Here is some progress:
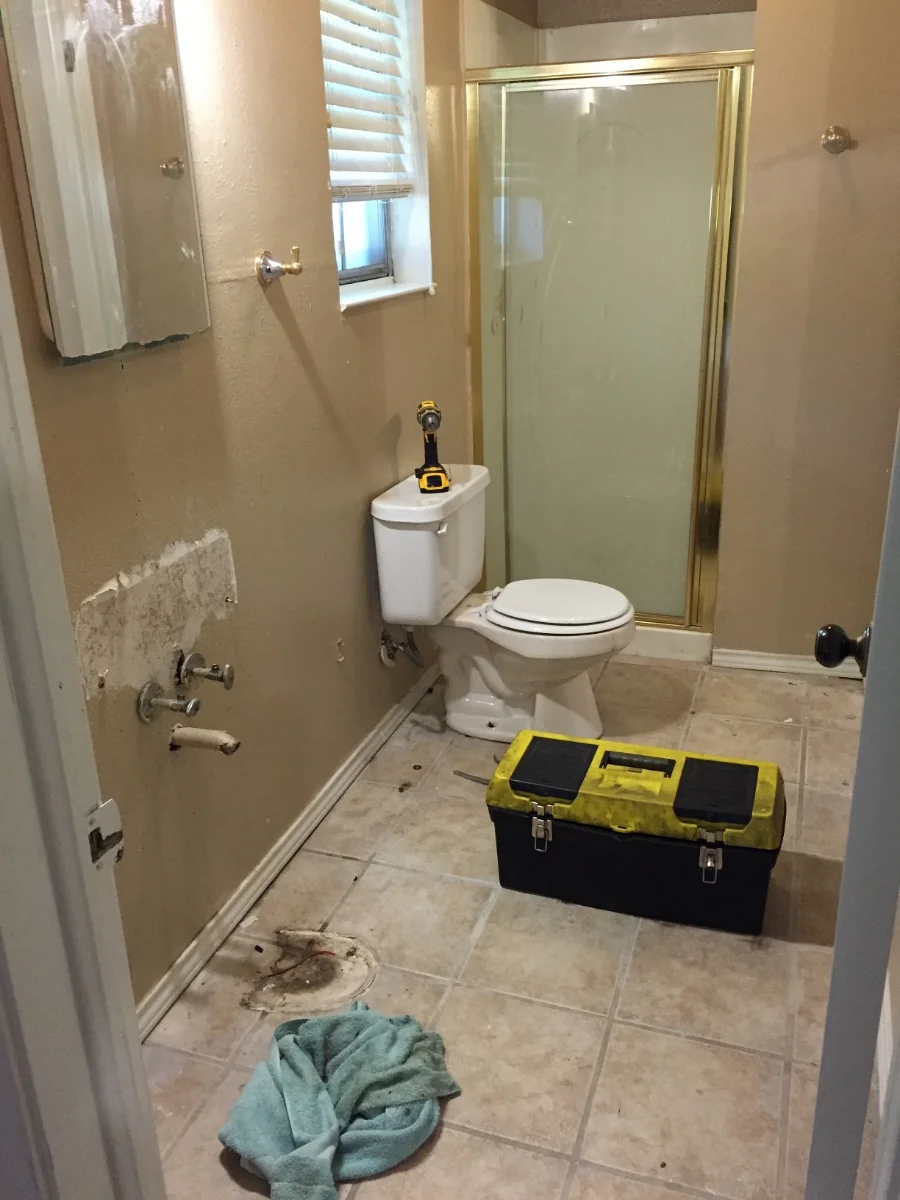
This bathroom was DISGUSTING. I missed the picture with the sink in it - see the stain on the floor to the left? That's what is left of the pedestal sink.
The pedestal sink was tossed. The toilet was tossed. The fixtures and the shower got demolished. The tiles were nasty. The shower was 24" wide and deep. A perfect square. It was moldy and short. When KB stood in it, the shower head was the same height as his chest. That wasn't going to work. We knew we needed a bathtub and a shower. We started with demo. It moved pretty quick - BUT, like any renovation - we ran into problems pretty early on.


Once KB got into the floor, he saw that all of the floor joists were rotten through. He had to replace all of the joists and the subfloor before he could do anything else. This added at least two weeks to our time table. Once we got the floors put back in, it was time to put the bathtub in place. Mortar base was laid, tub was leveled and shimmed, and then pressed into place.
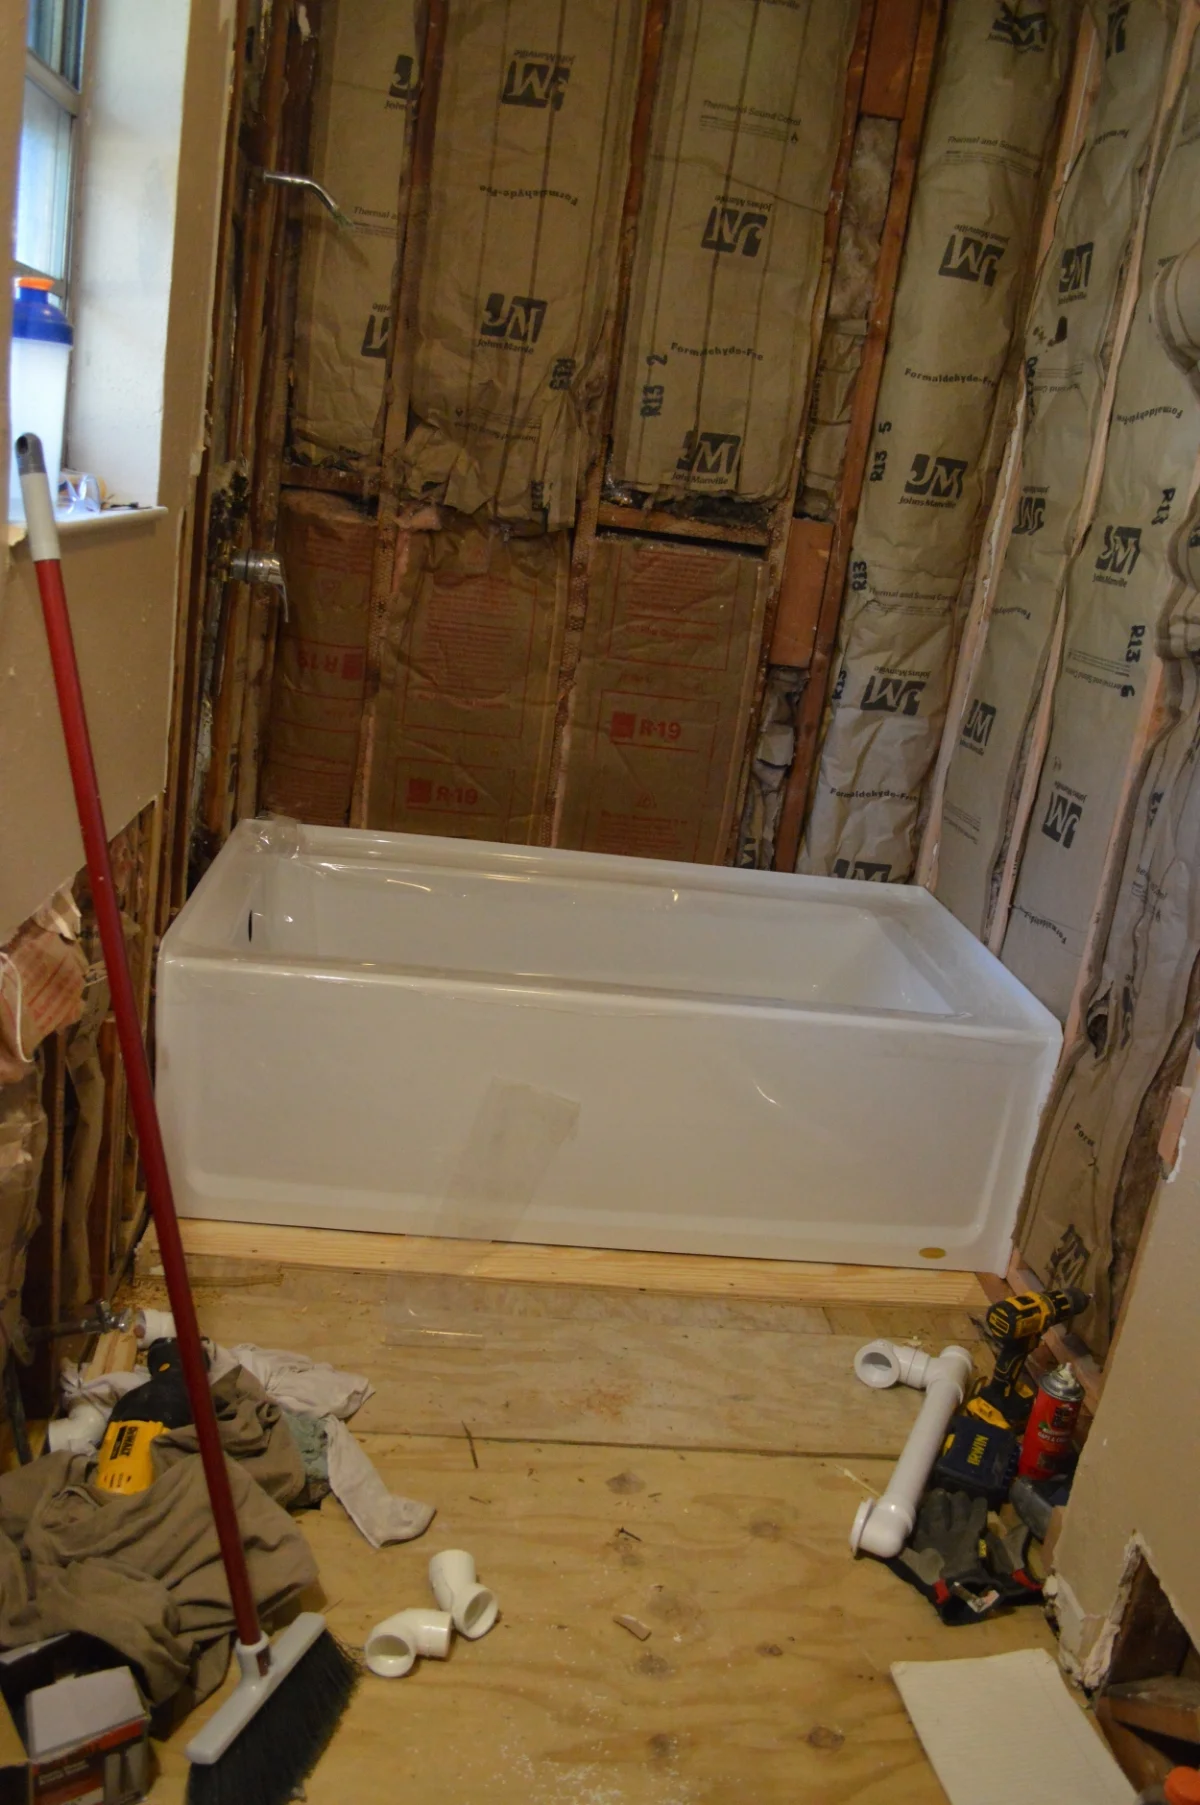
Next, it was insulation (Seen above) and walls.

What a difference walls make!!
Next Up: Bathroom Renovation - Part Two : Tile!